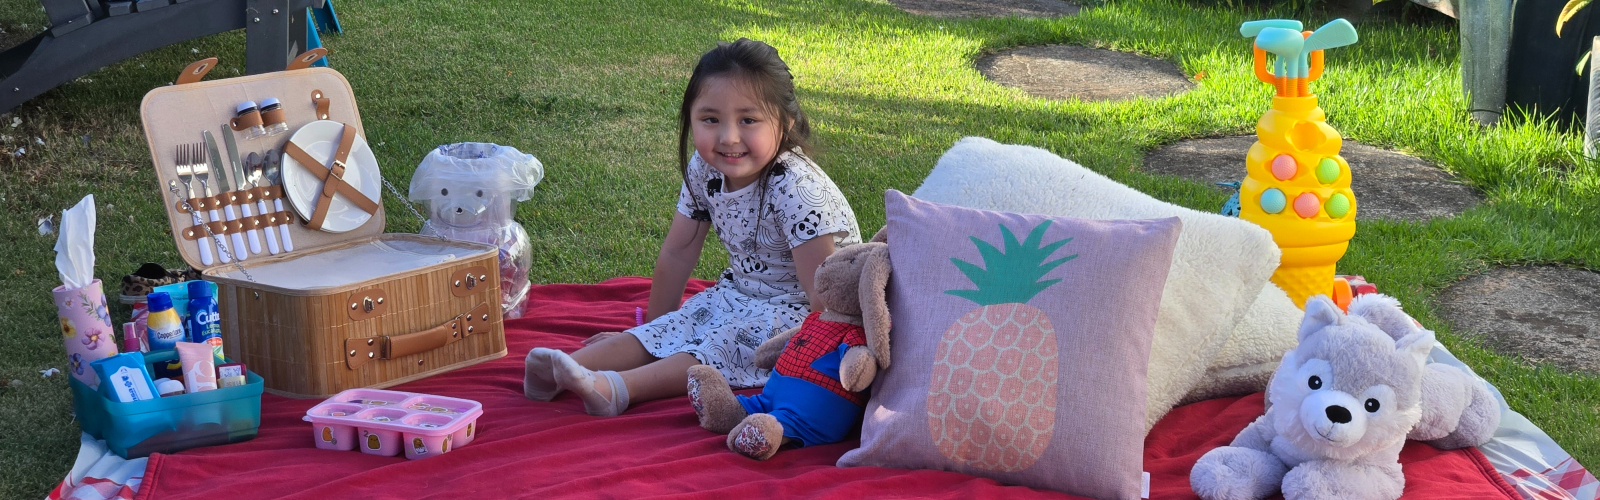
In Hawaii, we’re lucky to enjoy year-round picnic weather. Whether it’s a keiki fun day at the park, a romantic date at sunset, or a backyard barbecue, here are some hacks and snacks to help you plan a stress-free outdoor adventure.
Keep it cool
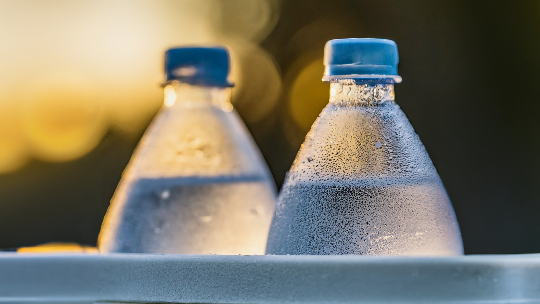
If you’re packing a cooler, instead of using ice cubes to maintain a frosty temperature, use frozen water bottles and grapes (or any other fruit you want).
Be sure to remove (or drink) about an inch of water from the water bottle before freezing since water expands when frozen. Not only will it keep your food cold, but it will also provide an ice-cold drink.
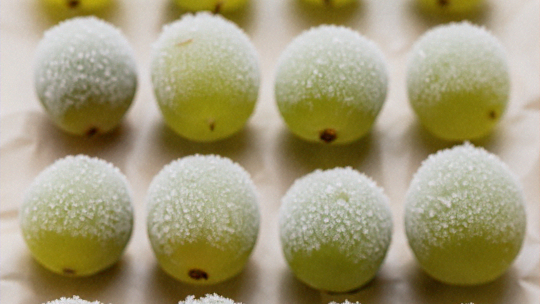
Freezing helps extend the life of grapes and turns them into the perfect picnic snack. You can use them as ice cubes and eat them after!
The easy way to freeze grapes is to remove them from the stem, wash, dry, store in a resealable plastic bag, and place in the freezer. They will come out as frozen grape clumps, which is fine for some. If you want individually frozen grapes, after you dry them, place in a single layer on a baking tray that’s lined with parchment paper.
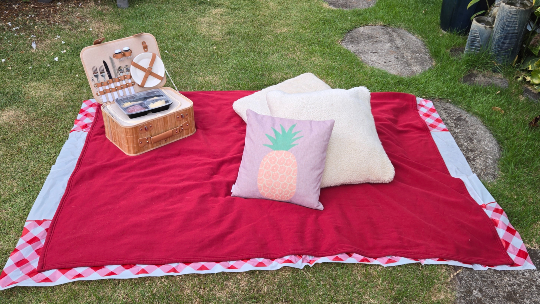
Keep it comfy
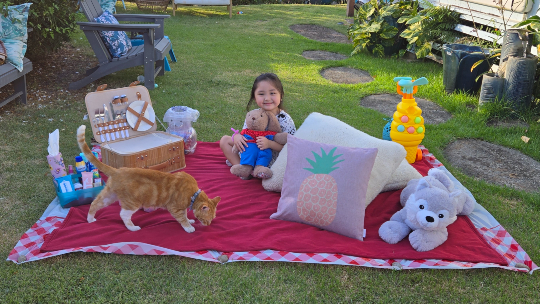
If you have a picnic blanket you love, but dislike how it gets muddy or soggy, place a shower curtain or plastic tablecloth down first, then put your blanket on top!
If you have outdoor pillows, bring them along! These pillows are usually fast-drying or water- and stain-resistant so you don’t have to worry about getting them dirty or wet.
Keep it together
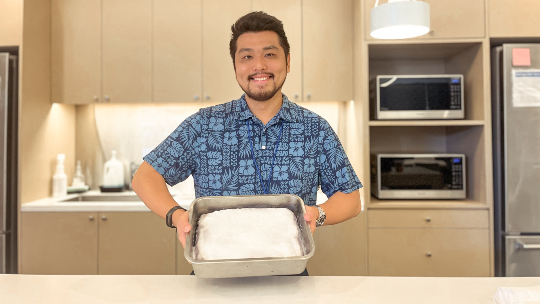
Muffin tins are surprisingly handy on picnics. While you can bake and bring muffins or cupcakes, you can also use the muffin tins for organizing snacks or condiments.
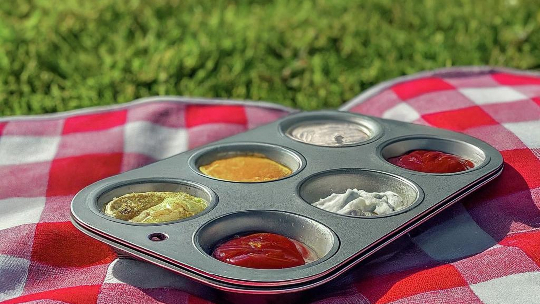
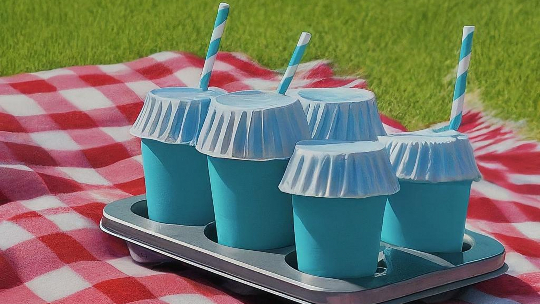
If your cups are the right size, you can also use a muffin tin as a drink holder.
Bonus: You can use cupcake liners to protect your drinks! Just stick a cupcake liner on top of a cup, poke a hole with a straw, and you’ll have a bug- and dirt-free beverage.
Keep it delicious (and easy)
Here are some picnic-friendly foods that you can make ahead of time and throw in a cooler once you’re ready to go.
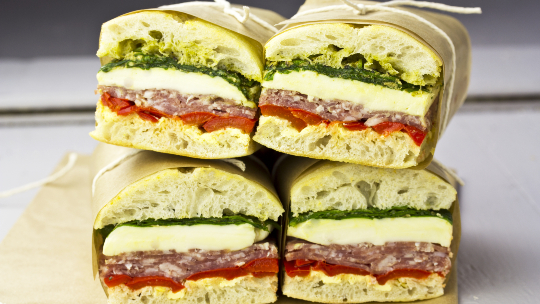
PRESSED SANDWICH
Sandwiches are a classic picnic food for a reason! They’re delicious and transport well. If you’ve never tried a pressed sandwich, you’re in for a treat. Pressed sandwiches are packed with delicious fillings and compressed with a heavy object to blend the flavors.
You can use your favorite type of bread, but ciabatta is a favorite since it’s sturdy (and tasty).
Cut your bread in half and, if you’d like, scoop out the inside of the bread to give you more space for ingredients. Don’t let the extra bread go to waste. You can cube and bake it with some olive oil to make croutons or make breadcrumbs in your food processor.
Add a spread like hummus, mayo, mustard, oil and vinegar, or pesto to both sides of the bread. Or you can leave your sandwich dry.
On the bottom half of the bread, add one or more types of cheese and then add your protein. You can use cooked chicken; deli meats like ham, roast beef, and turkey; Italian meats like prosciutto and salami; or anything else you want. Check labels for sodium levels.
Now’s your chance to add anything else you’d like: Artichokes, arugula, eggplant, lettuce, olives, onions, peppers, spinach, tomatoes, etc.
For an extra burst of flavor, drizzle with Italian dressing or your favorite vinaigrette, salt and pepper, and Italian seasonings.
Take the top half of the bread and place on top of your masterpiece sandwich. Press gently and wrap with parchment paper, plastic wrap, or aluminum foil. If you have twine or string, tie the sandwich tightly.
Gently move the sandwich to the refrigerator and place a cutting board or cookie sheet on top. Add something heavy like a cast iron pan, large pot, six pack of drinks, canned goods, etc.
Refrigerate for at least six hours or overnight.
When you’re ready for your picnic, keep your sandwich in a cooler until you’re ready to dig in.
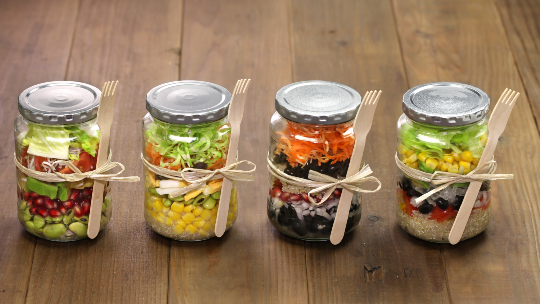
LAYERED JAR SALAD
Even if you’re not a fan of greens, you’ll enjoy these mason jar salads. They’re customizable and perfect for picnics since they’re portable (and delicious). When packing your salad, remember to leave some room at the top so you can shake it up.
Here’s a guide, but remember, you can add or omit anything you want.
- Start by adding dressing at the bottom of the jar, about 2 Tbsp.
- Then, add ingredients that won’t get soggy or will marinate nicely such as beets, bell peppers, broccoli, carrots, celery, cherry tomatoes, cucumbers, mushrooms, olives, onions, etc.
- Next, add a protein: Chickpeas, cooked chicken, black beans, deli meat, hard-boiled eggs, shrimp, tofu, etc.
- Now it’s time for other add ins: Cheese, fruit, grains (quinoa, pasta, rice), nuts, etc.
- Finally, add your greens: arugula, baby spinach, kale, romaine lettuce, spring mix, etc.
Keep the salads in a cooler until ready to eat. Then, shake it up and enjoy!
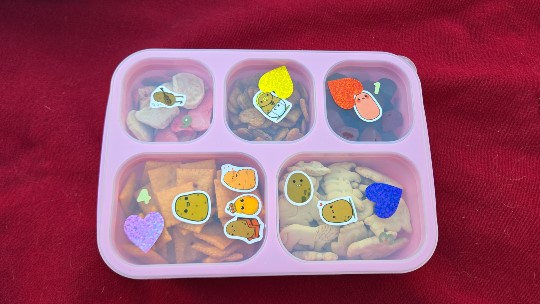
SNACKLE BOX
This easy picnic hack is perfect for keiki since it keeps a fun selection of snacks organized and ready to go. You can use any food-safe container. The more compartments, the more variety. if you have a dedicated snackle box, your kids can decorate them, too!
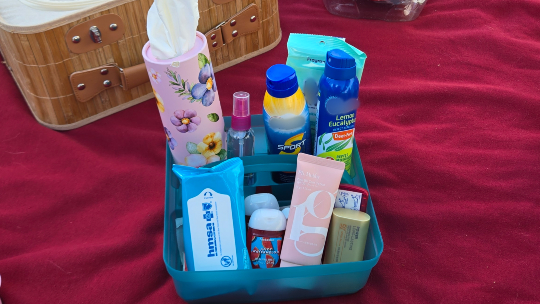
Keep it clean (and protected)
Remember to pack the following items to keep you sun safe and germ free:
- Bug spray
- Hand sanitizer
- Suntan lotion
- Sanitizing hand wipes
- Tissues or napkins
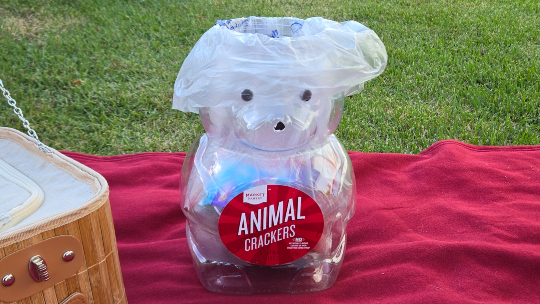
TRASH CAN HACK
Use a container lined with a bag for your trash. We recycled an old animal cookie container. Our helper enjoyed “feeding the bear” aka throwing away her trash! If your container has a cover, you can cover the container and throw the trash away later whenever it’s convenient.
Now you’re ready to picnic like a pro!
Outdoor fun
Here are some stories to inspire you to take advantage of life in Hawaii and get outside!
- adventures in biking
- an epic bike ride around the world
- bonding keiki to the kai
- from pool to open water
- national golf day: a healthy hobby
- plumeria paradise on oahu’s north shore
- staying sun safe
- surfing through life
- time to celebrate national walking day
- water safety tips to keep you and your keiki safe